Windows
 Apple Silicon


Table of Contents
Note: If the issue persists, please contact our support email [email protected] for further assistance.
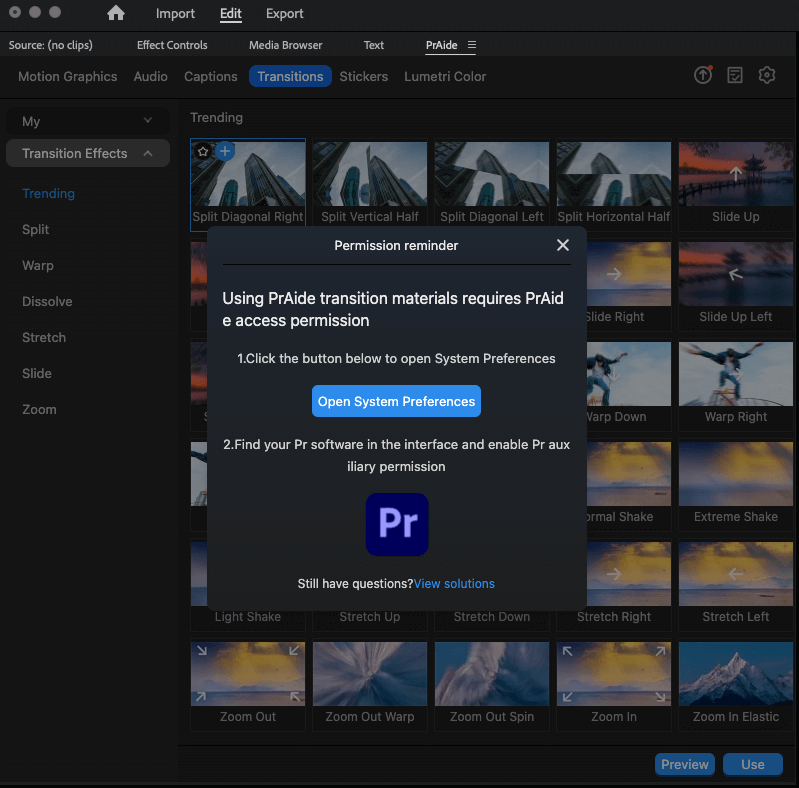
When using PrAide on Mac, you may experience issues such as transitions failing to apply or not responding when dragged onto the Premiere Pro timeline.
This is because PrAide has not been granted Accessibility permission, which is required for applying and syncing transition assets.
1.Permission pop-up prompt
When you use a transition feature (e.g., clicking “Apply Transition” or dragging a transition), macOS will automatically display a permission request pop-up if Accessibility permission is not enabled. This is a normal system prompt, not a software error.
2.Enable Accessibility permission
(1) Open Settings via the pop-up
Click the shortcut button in the pop-up to go directly to: System Settings → Privacy & Security → Accessibility.
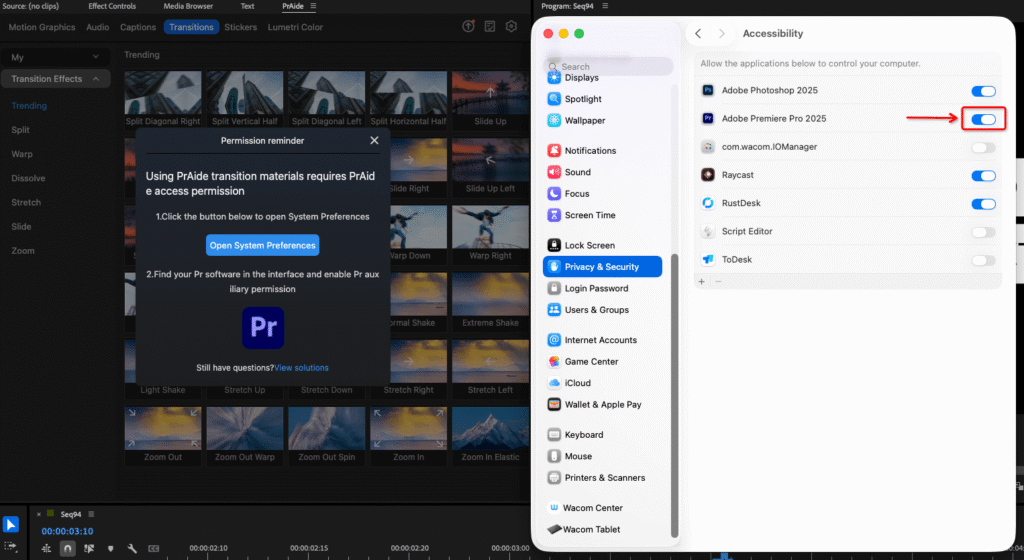
(2) Allow Premiere Pro
Check Adobe Premiere Pro under “Allow apps to control this computer.”
Tip: If Premiere Pro is not listed, click “+”, select it from the Applications folder, then enable it.
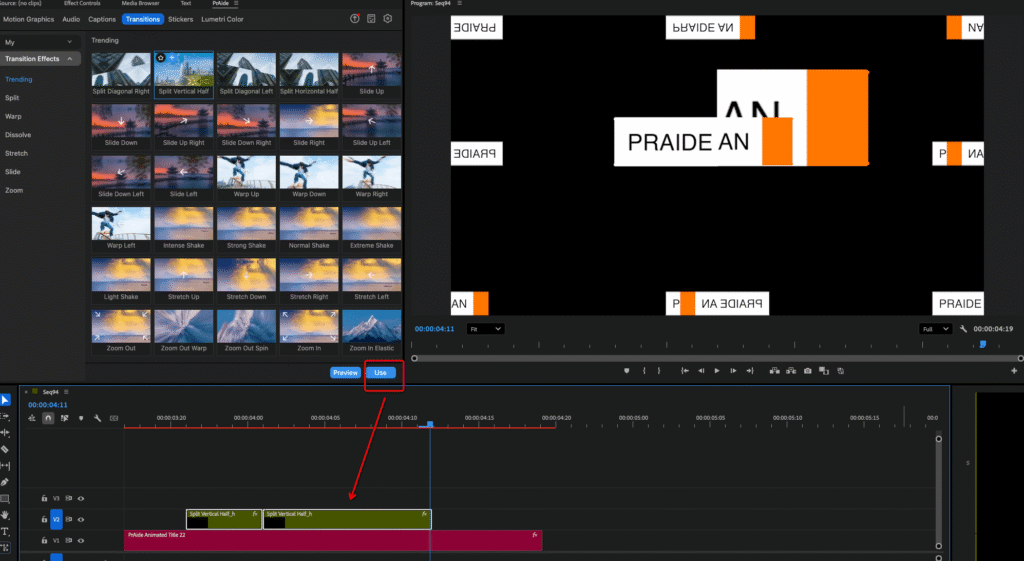
3. Verification: Confirm the permission is active
After completing the settings:
(1) Return to PrAide (restart the software if necessary).
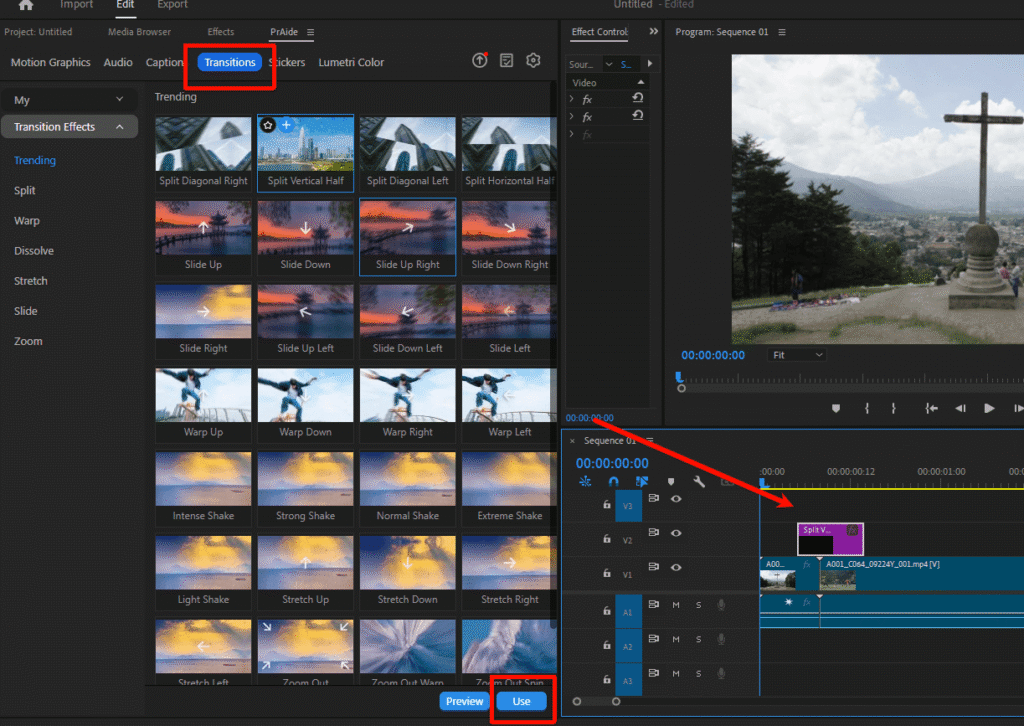
(2) Try the transition feature again (drag a transition to the timeline or click “Apply Transition”).
(3) If the transition attaches correctly between clips and the Premiere Pro timeline runs smoothly without lag or errors, the permission has been successfully enabled.
Download for Windows / Mac: https://pr.aide.art/