Windows
 Apple Silicon


Table of Contents
This article explains how to install PrAide on your computer step-by-step so you can use it with Adobe Premiere Pro.
Step 1: Check Installation Requirements
(1) Supported systems: Windows 10 or above and MacOS 10.5+.
(2) Premiere Pro version: Adobe Premiere Pro 2020 (14.4) or above.
To ensure full compatibility, make sure your system and Premiere Pro meet these requirements. We recommend using Pr 2022 or above for smoother performance.
Step 2: Visit the Official Website
Open your computer browser and enter
to go to the official PrAide download page.
Step 3: Download the Installer
Choose the download button based on your system:
(1) Windows version
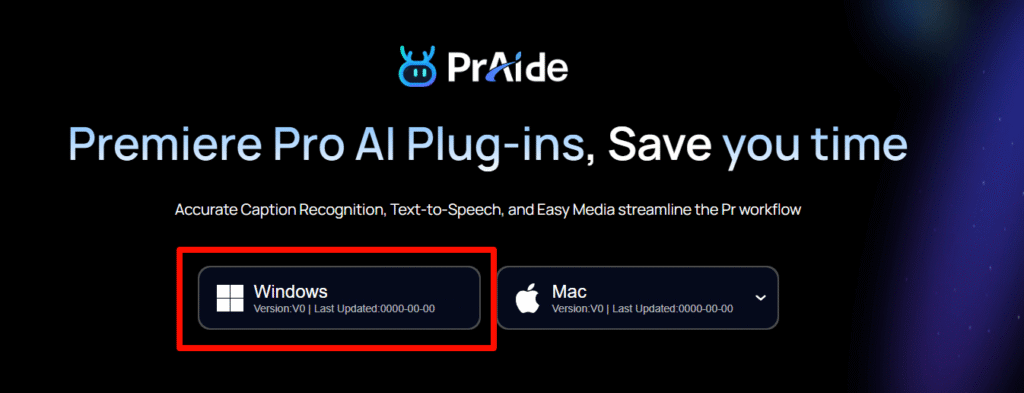
(2) Mac version
For Mac, choose the correct chip version
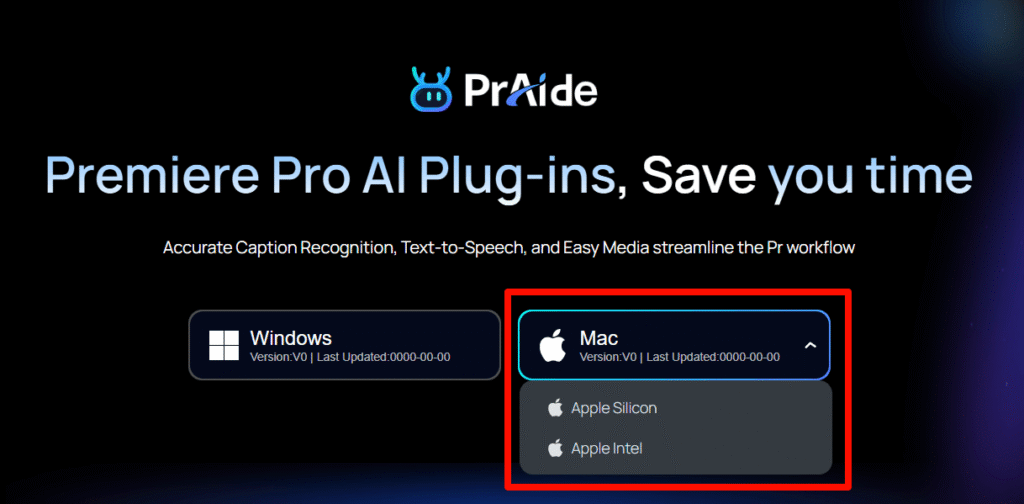
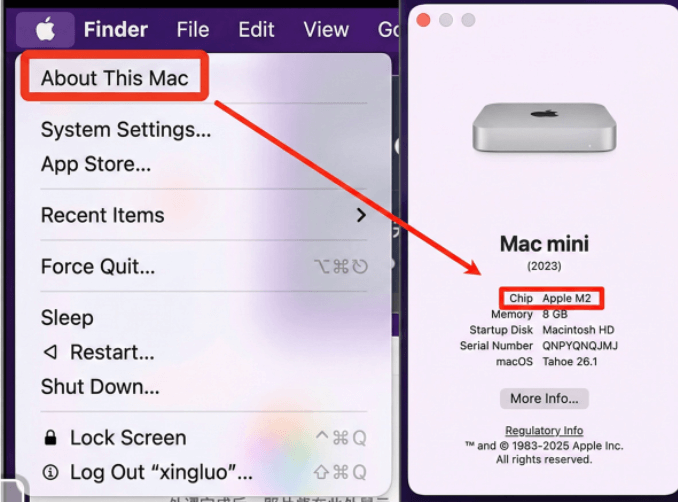
If you’re unsure which chip you have, follow Apple’s system info to check.
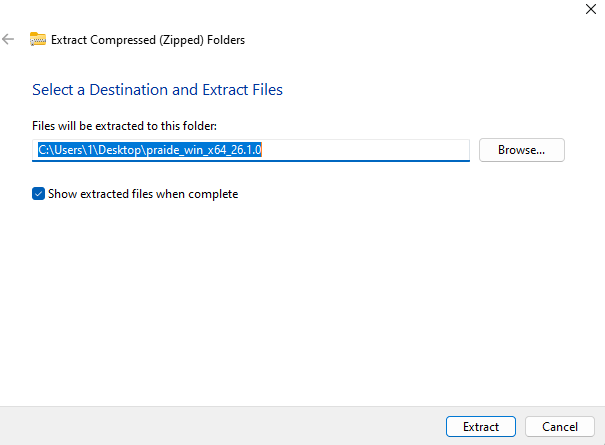
Step 4: Extract the Installation Package
(1) Windows
①Double-click the downloaded ZIP file, then choose “Extract All”.
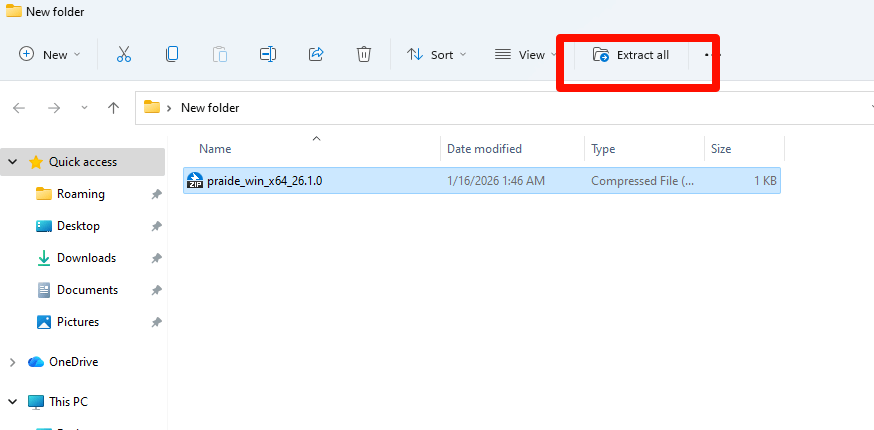
②Or right-click the file and select “Extract All,” then select a folder to extract to.
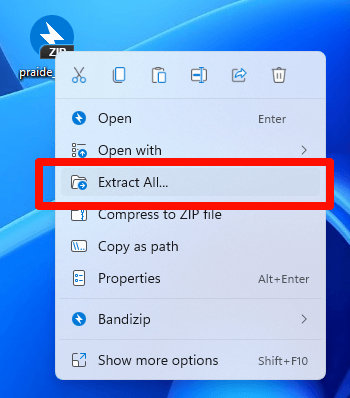
After extraction, double-click to start installation.
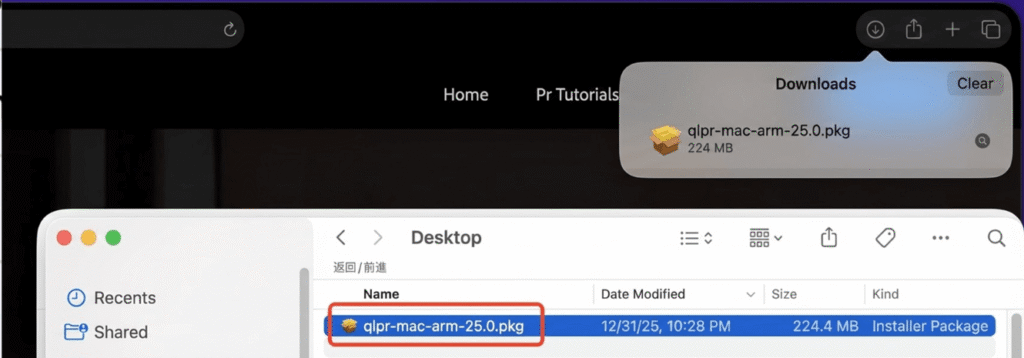
(2) Mac
Downloaded Mac packages usually unzip automatically. Simply double-click to open and install.
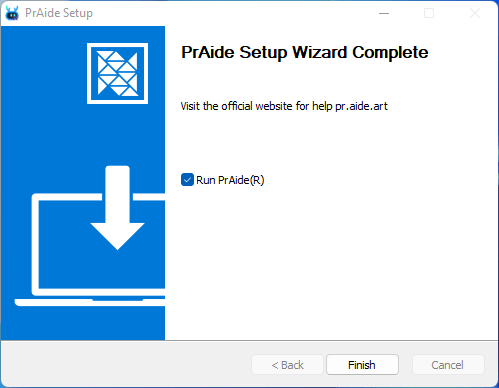
Step 5: Install PrAide
Double-click the installer:
You can change the installation folder from default if needed.
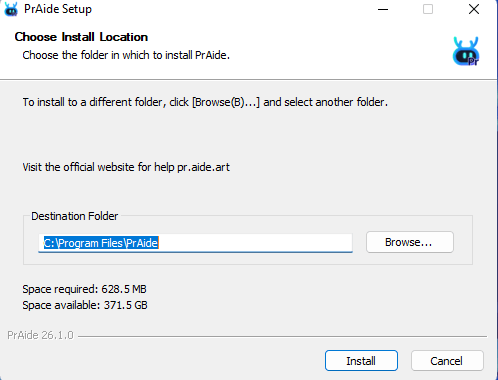
Follow the on-screen prompts to complete installation.
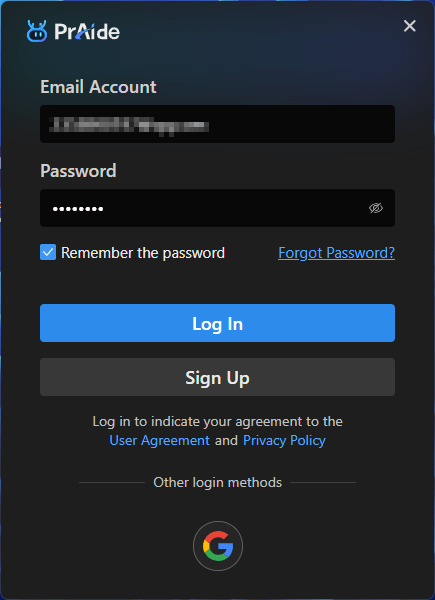
Step 6:Open PrAide and register or log in.
Step 7: Enter Invitation Code
Click here to get an invitation code.
Once entered, PrAide will open Premiere Pro automatically.
If it fails, please manually connect PrAide to Premiere Pro following the connection guide:
Linking Premiere Pro with PrAide – pr aideart.
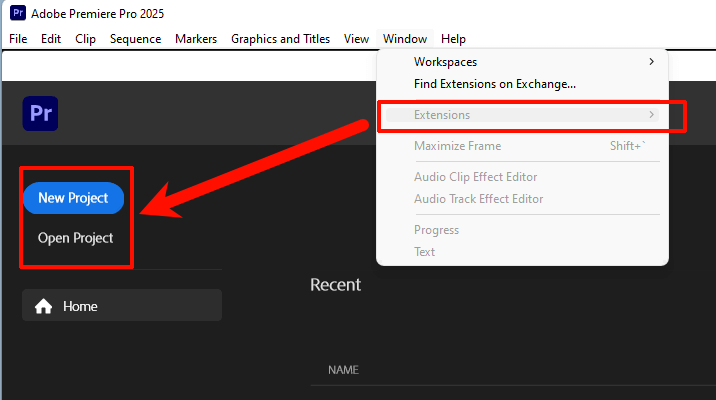
Step 8: Open Premiere Pro and Your Project
Launch Premiere Pro and open your current project.
In Premiere Pro: go to Window → Extensions and find PrAide in the list.
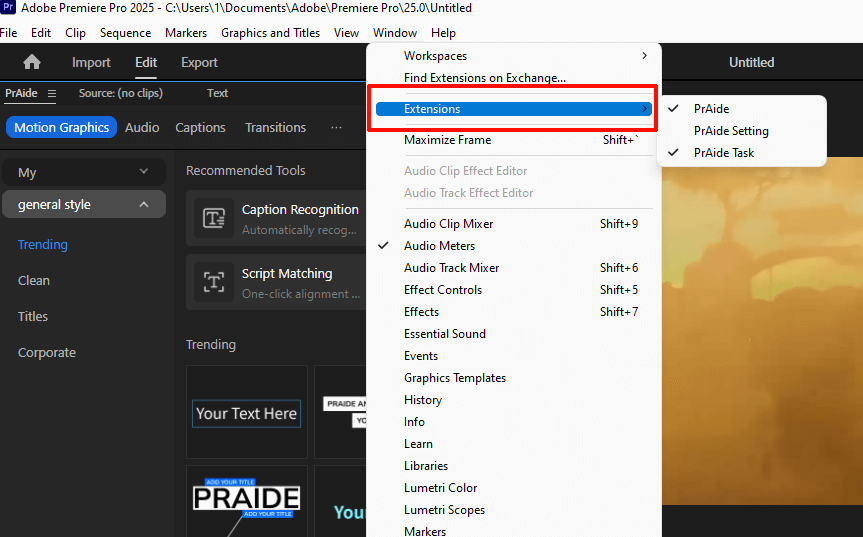
If the extension is greyed out, make sure your project is open first.
Step 9: Embed PrAide Panel
Once enabled, you can embed PrAide inside the Premiere Pro interface and resize the panel as needed.

Download for Windows / Mac:
Help:
帮助中心