Windows
 Apple Silicon


This guide will teach you step-by-step how to create professional-level Pr Captions, suitable for beginners!
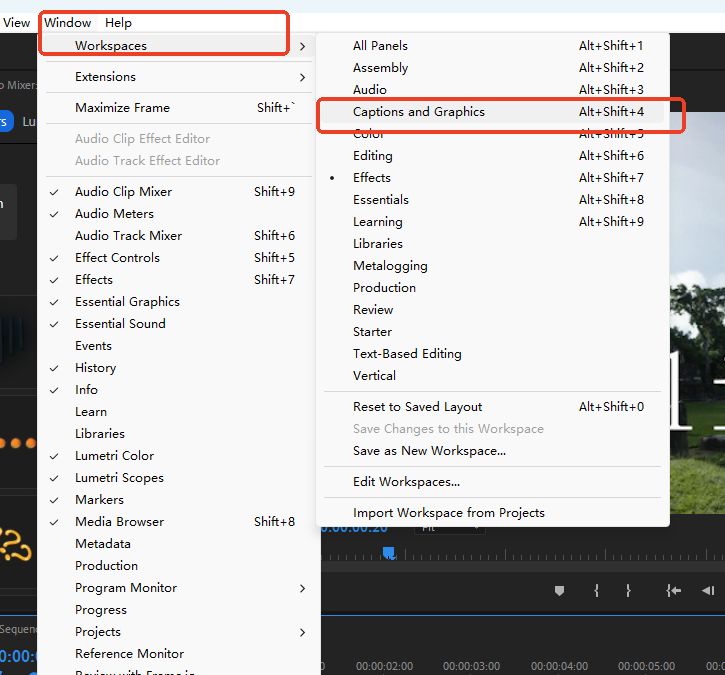
I. Preliminary Preparation: Switch Workspace
First, switch to the Captions and Graphics workspace. Path: Window > Workspace > Captions and Graphics. Then, select the target Caption on the Caption track that needs editing to begin stylization settings.
II. Core Style Settings: Basic Text Adjustments
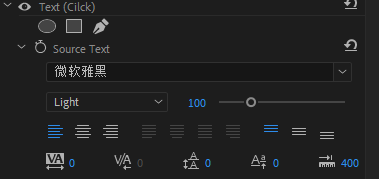
(1) Font-Related Settings
In the “Text” section of the “Essential Graphics” Panel, you can complete the following adjustments:
- Basic Font: Customize font, font style (e.g., Regular / Bold / Italic, etc.), and font size.
- Paragraph Alignment:
- Horizontal Alignment: Supports Left, Center, Right, Justify.
- Vertical Alignment: Supports Top, Center, Bottom (determines the growth direction of multi-line Captions).
- Leading: Adjust the vertical spacing between lines of text.
- Faux Styles: Set faux Bold, Italic, All Caps, Small Caps, Superscript, Subscript, Underline, and other text styles.

(2) Text Position and Size Adjustment
Adjust text position and size using the “Align and Transform” options:
- Zone Positioning: Select preset zones to quickly place Captions in different screen positions.
- Position Fine-Tuning: Add offset in “Set Horizontal Position” and “Set Vertical Position”. Vertical/Horizontal text alignment automatically adapts to the zone position.
- Text Box Size:
- Numerical Adjustment: Reduce/expand the text box via “Set Horizontal Scale” and “Set Vertical Scale”. This affects text wrapping and paragraph alignment.
- Visual Adjustment: Directly drag the text box controls in the Program Monitor to modify its size.
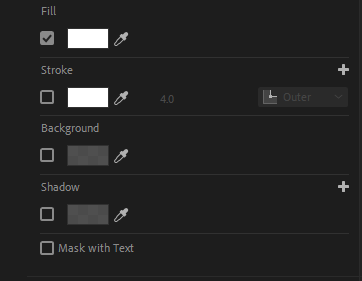
(3) Text Appearance Enhancement
Flexibly use Fill, Stroke, Background, and Shadow to optimize the visual effect of Captions:
- Fill: Modify the base color of the Caption text.
- Stroke: Add single or multiple strokes. Use the “Graphic Properties” menu under the wrench menu for finer control over stroke style.
- Background: Add a background box to the Caption. Customize background color, extra padding, and background opacity.
- Shadow: Add shadow effects and fine-tune the presentation with parameters like opacity, angle, and distance.
III. Advanced Editing: Upgrade to Graphics
To add advanced effects like animations or special effects to Captions, you can upgrade them to source graphics. Operation is as follows:
- Path: Graphics and Titles > Upgrade Caption to Graphic (available when the Timeline or Essential Graphics Panel is in focus).
- Upgrade Scope: Supports upgrading single/multiple selected Captions, all Captions, or Captions across multiple Caption tracks simultaneously.
- Efficiency Optimization: Can set keyboard shortcuts to accelerate the upgrade process.
- Subsequent Editing: Upgraded Captions can be edited like regular graphics, allowing the addition of animations, effects, etc.
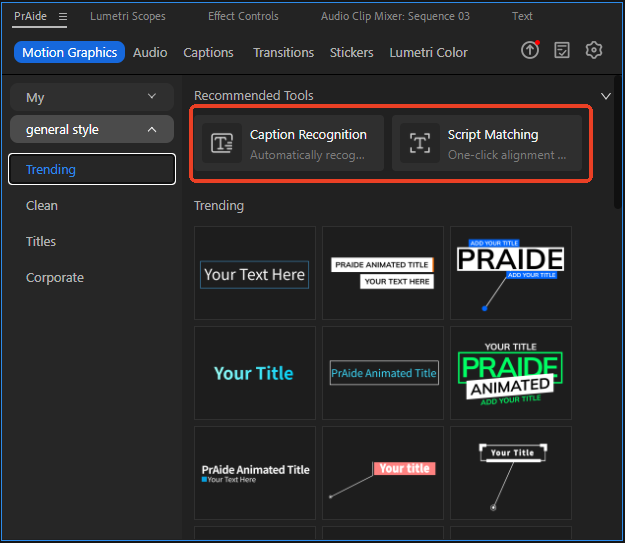
IV. Tool Recommendation: PrAide (Efficiency Booster)
In addition to Pr’s built-in Caption editing features, PrAide can significantly simplify the Caption creation process. Core advantages include:
- One-Click Application of Caption Templates: Built-in Caption templates with various preset styles (covering variety shows, film/TV, short videos, etc.). No need to manually adjust font, stroke, shadow, etc. Select a template and apply it with one click to quickly match the video style.
- Audio to Captions Automatic Generation: Supports importing audio files or directly recognizing audio content from video, automatically transcribing it into Caption text with precise alignment to the audio Timeline. Eliminates manual word-by-word input, greatly saving Caption production time.
- Seamless Integration with Pr Workflow: Generated Captions can be directly imported into the Pr Timeline. They can then be further fine-tuned using the stylization settings mentioned earlier (text style, position, appearance), balancing efficiency and personalization needs.
PrAide Download: https://pr.aide.art/
Perhaps a simple attempt will bring unprecedented ease to your Pr editing. If you’re struggling with creating Pr Caption effects, click to Install Now and try PrAide bravely—you might gain unexpected rewards.