Windows
 Apple Silicon


Table of Contents
For editors, the pain points of Pr editing are almost unavoidable: the interface has so many features it’s overwhelming, rough cuts require constant readjustment, finding sticker assets means searching everywhere, and manually typing Captions consumes half a day – especially for beginners, just getting familiar with the operations takes considerable time. Pr editing doesn’t have to be this laborious! Today, we’ll break down the complete Pr video production workflow (including adding Captions) into simple steps, from understanding the interface to using AI Captions, so even beginners can follow along to produce videos quickly. Finally, we’ll share a plugin tool that can save 80% of your time!
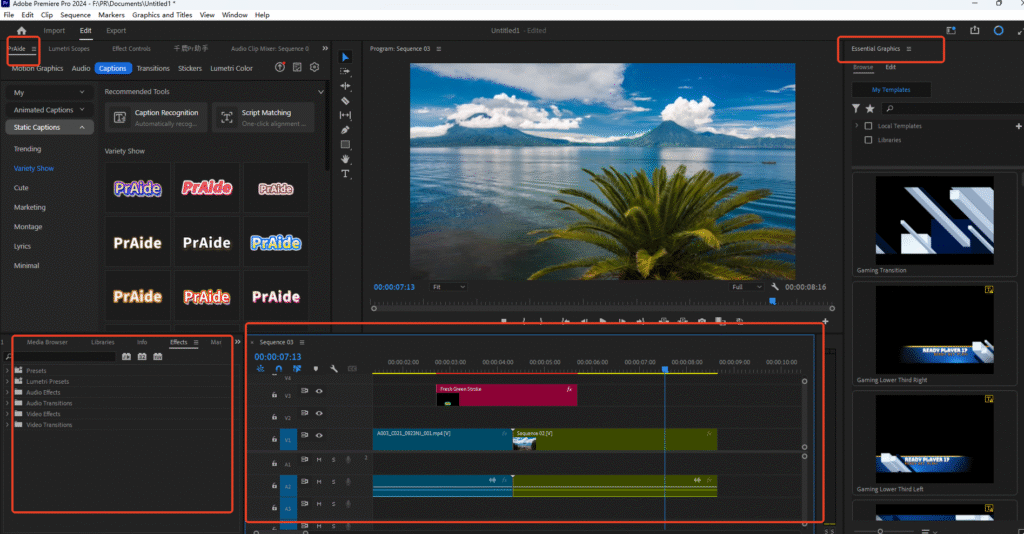
I. First, Understand Pr’s Basic Workspace Interface for Smooth Editing
After opening Pr, the interface is mainly divided into 4 core areas. Knowing them makes editing smoother:
- Media Area (Left): Imported videos, Audio, and plugin assets (e.g., templates from PrAide) are stored here. Drag them directly to the Timeline to use.
- Plugin Assets Area (Top Left): Plugins like PrAide centralize assets like Stickers and Caption templates here for one-click access.
- Timeline Area (Bottom): All editing operations (cutting video, adding assets, adjusting order) are done here, with clear track layering.
- Preview Monitor (Top Right): Allows real-time video preview. The “Essential Graphics” Panel on the right (need to manually open via Window > Workspace > Graphics) is used to adjust Caption and Sticker styles.
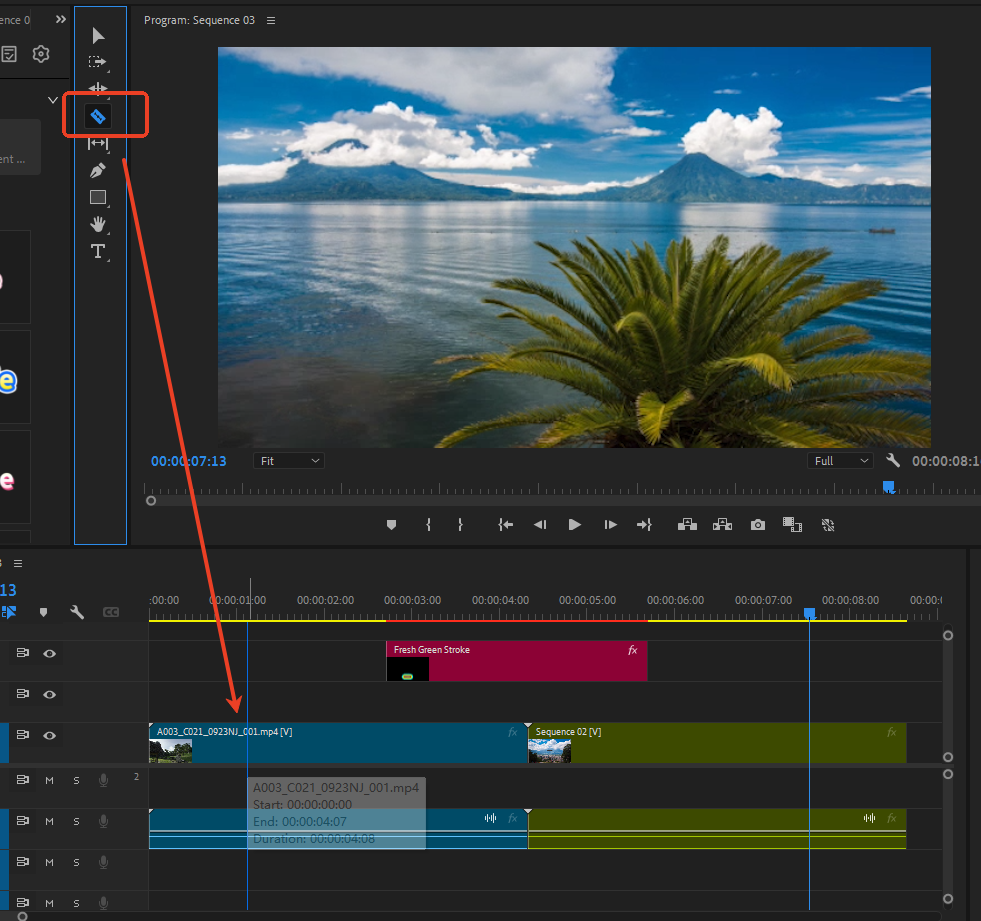
II. Pr Rough Cut: Use the Razor Tool to Quickly Trim Video
After obtaining the raw footage, start with a rough cut to remove unnecessary content:
- Find the “Razor Tool” in Pr’s left toolbar (shortcut: C). Click on the position in the Timeline video that needs cutting to split the video into two segments.
- Select unwanted segments and press Delete. Drag the remaining segments to align them, completing the rough cut.
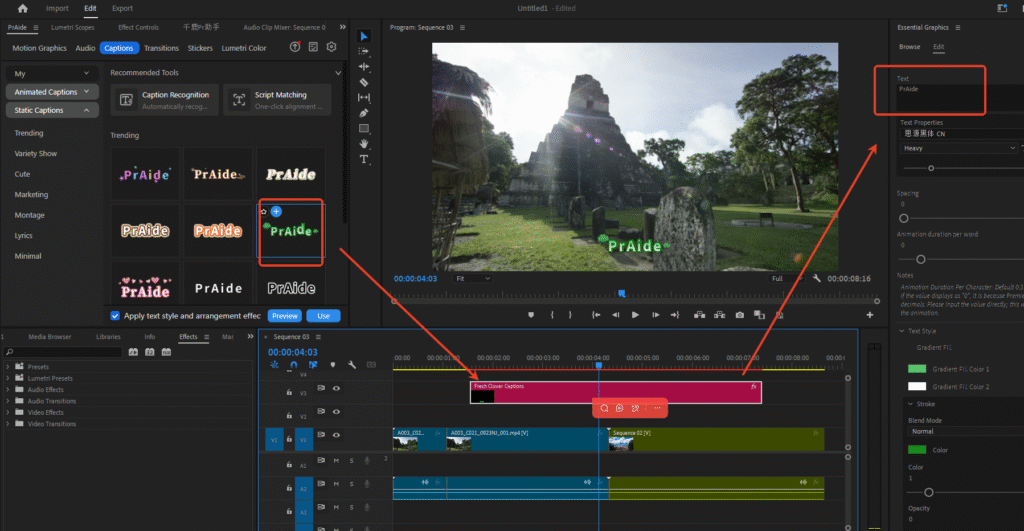
III. Add Stickers: Use Plugin Assets to Enhance Videos, No Need to Search for Resources
Traditionally, adding Stickers in Pr requires finding your own assets and performing cutouts. Using the PrAide plugin is more convenient:
- Open the PrAide Panel within Pr. In the “Stickers” section, select from Trending assets (e.g., templates like “Support with Triple Interaction” or “Best-Seller Promotion”).
- Directly drag the Sticker onto the video track in the Timeline to add it to the video.
- You can also adjust the Sticker‘s size and position in the “Essential Graphics” Panel without needing extra cutout operations.
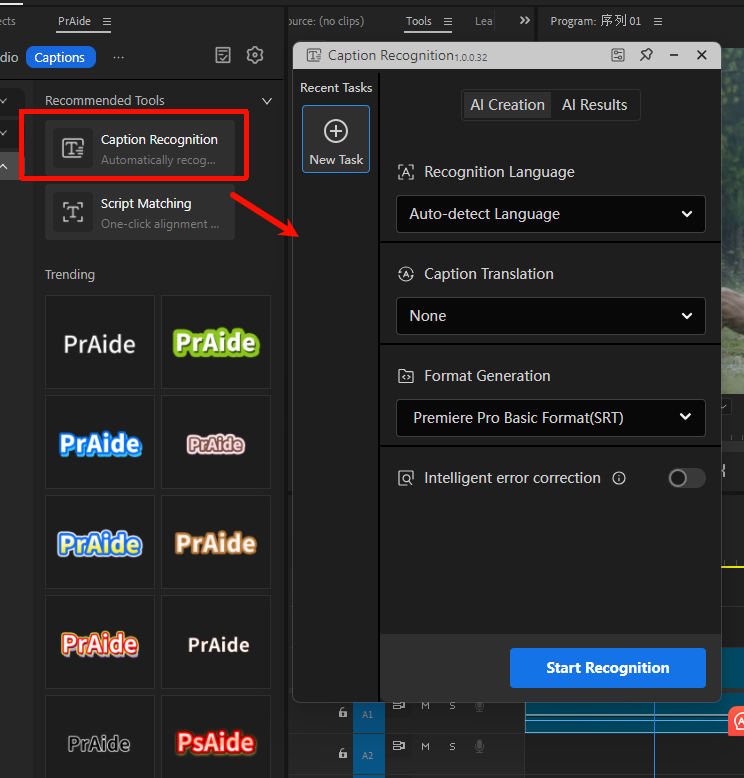
IV. AI Caption Recognition: 10x Faster Than Manual Input, Plus Smart Correction
Manually clicking the “T” tool in Pr to type Captions is not only slow but also error-prone. Using PrAide‘s AI Caption feature is much more efficient:
- Select the video track on the Timeline and open the “Captions” section in the PrAide Panel.
- Click “Caption Recognition“, select the recognition language (supports auto-detection), and turn on the “Smart Correction” switch.
- Click “Start Recognition”. AI will automatically convert the speech in the video into Captions and insert them directly into the Pr Timeline.
- The generated Captions can be further edited on the Timeline. Font, style, etc., can be adjusted in the “Essential Graphics” Panel, saving most of the time compared to manual input.
Final Thoughts
Traditional Pr editing requires you to handle the interface, rough cuts, assets, and Captions yourself – a tedious and time-consuming process. PrAide integrates these features into Pr, offering a one-stop solution from assets to AI Captions, making it especially suitable for editing beginners and creators looking to boost efficiency.
To experience this Pr plugin that can save 80% of your editing time, visit the official website to download and creativity — the things that truly matter.
PrAide Download Address:https://pr.aide.art/